HOW TO MANUALLY INSTALL YOUR EMAIL Signatures
When do you need to manually update your signatures?
Manually updating your signatures is typically a temporary fix for when your email signatures are not updating correctly in your Outlook and is not a permenant solution. Your signatures should update automatically within a couple days of a change being submitted, so this is to be reserved for when you need to use the newest versions of your email signatures immediately.
IMPORTANT You CANNOT make your own changes to your email Signatures. This creates technical issues which may cause your email signatures to not update correctly.
FOR TITLE CHANGES/NAME CHANGES, please contact HR@ConnectWise.com first so that it can be updated at all locations.
FOR OTHER MINOR CORRECTIONS, please contact Marketing@ConnectWise.com.
ALSO IMPORTANT Your computer must be on when the script runs in order to automatically update your signatures. If you're having issues with your signatures not updating, please leave your machine on overnight so that the script has time to make the checks required to update.
If your signatures are not updating after doing this, please submit a ticket to Marketing@ConnectWise.com.

Step 1: Make sure you can see hidden files.
Signature files are normally hidden, so you will need to make sure your computer can see hidden files. You can turn on show hidden files by bringing up Windows Explorer.
|
1. Open Windows Explorer, you can get there by clicking the Windows Start button, then select All Programs, then select Accessories and click on Windows Explorer. 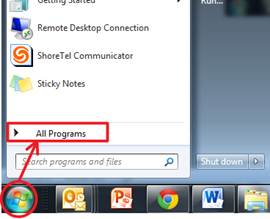
|
2. In Windows Explorer click Tools, then Folder Options. 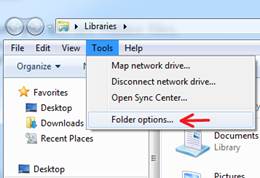
|
3.From Folder Options windows, click the View tab. 4.In the Advanced settings list find: Show hidden files, folders and drives. 5.Click to turn it on, then click the OK button. 
|
Step 2: Delete your old Signature files in Outlook.
|
1.Go to Windows Explorer. 2. Click on Local Disk (C:) and navigate to: 3. Delete all files in this folder. 4. Paste your new Signatures into this folder. 5. Some of you may not have a Signatures folder. If not, then create a Signatures folder here: C:\Users\ [your windows login name] \AppData\Roaming\Microsoft 
|
Note: The AppData folder is normally hidden. If you have completed Step 1 it will be visible, it will be faded, but will be visible. If you don’t see this folder, go back to Step 1 to turn on hidden files 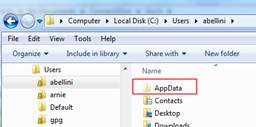
|
Step 3: Get your new Signatures - they make you look cool :)
|
1. Open up a second Windows Explorer window. 2. Navigate to the Folder with your new Signatures. To get there, you can paste this link below into the Windows Explorer address bar:
3. Find your name, open folder and copy everything from this folder into your Signature folder: You opened this folder in the previous step. 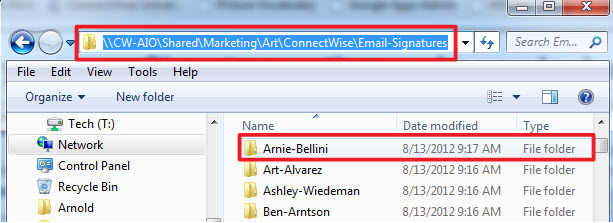
|
3. Paste your new signature into the Signatures folder. Copy over old Signature files. Replace them. Note: Signatures must be pasted directly into the Signatures folder for Outlook to see them. Do not copy into a folder below Signatures. 
|
Step 4: Using Your Email Signatures.
|
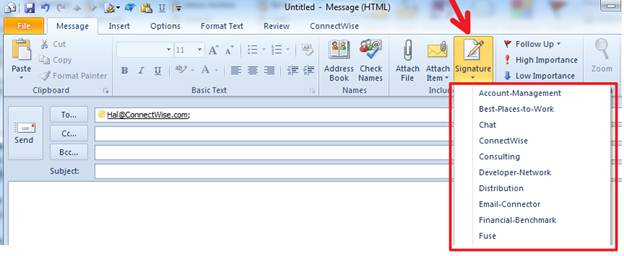
1.Open Microsoft Office Outlook 2. Start a new email. 3. From the Message tab, click the Signature button to add in your signature to your email. |
Step 5: Set your default Signatures
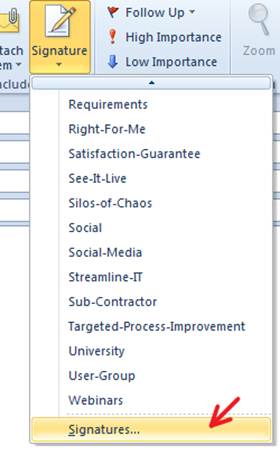
1. Create a new email message, and click on the signature tab, then Signatures at the bottom of the drop down box. This will open up a new dialog box. |
2. From here, you can choose a default signature for all new messages, and a default signature for reply and forwarded messages. At this point, every time you select a new message or reply, it will auto populate with the Signatures you chose. You can override the signature for a specific message by using the Signature dropdown box above. 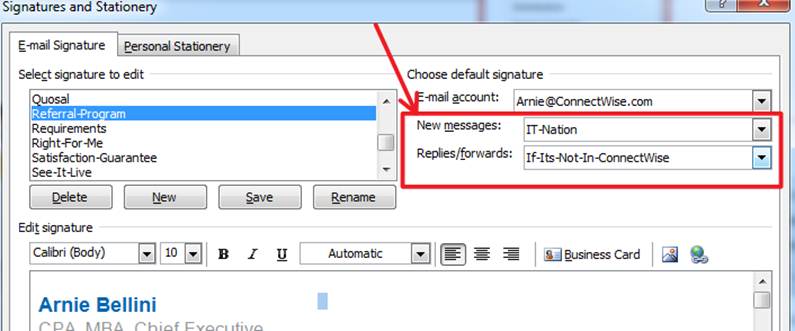
|